Funhouse Studio

Where Dreams become Reality

Funhouse Studio

What's Up Lately?

My Resume

FunProjects Blog


I’ve been working on a number “in house” and “offsite” projects. 


AHOP Rewire:
The most challenging offsite project was to find a solution to the cabling mess for the sound system at Austin House of Prayer (AHOP).  AHOP is a multiuse facility where a variety of prayer teams, youth groups and churches come together at various times of the week.  I attend of the churches (Doxology) that use the facility so I got to build the system originally.
 The challenge originally was to simply to drop in the Doxology a portable system so we could quickly be “up and running”.  We’d fix it when we built a platform.  That was a while back and the platform project has not materialized.  Cables were tripping folks, shorting, and the system was very confusing to fix when someone would randomly plug in when something had mysteriously “unplugged itself”. 
 So I took a Saturday and with the dedicated help of Seth Hart, Kara MacDonald and Noah Cogdell, we tore down the old system and rebuilt a neater system with a minimal investment for some cable organizers.  There are a few glitches but so far it’s a big improvement in usability.  

 Next should be a training session although we need to be looking at a new mixer sometime (coffee and Mackie’s don’t mix). 
 

The Church Bass:

One day at the church band rehearsal I asked why are we not using the Church’s Tobias bass?  The answer was that the D string tuner was broken…. Probably had been for over a year… maybe 2 years.   I found that Steward MacDonald carries as nice Gotoh replacement that nearly matches.  The Gotoh is much beefier.  I expect the rest of the stock tuners to die sometime but for under $20 we’re back in business.


While I had the bass in the studio I noticed the frets looked horrible.  Since I was replacing the strings I thought I’ll give the frets a little polish.  Then I notice the neck wasn’t straight.  So I pulled out the bass scale level and adjusted the neck.  While polishing the frets I noticed some interesting scars on them… someone tried to level the frets when it was the neck that made the fret board not level!!!  So with the neck adjusted I did my best to just “kiss” the damaged frets with my fret files and polish boards. 


The bass looks good and plays good now but there’s not much left.  Once the frets wear it will be time for  re-fret. 


PRS Custom 24:


I have a PRS Custom 24 that’s fairly old by PRS standards (1991).  It was used and I traded my 1963 Fender Jazzmaster for it before Jazzmasters made a comeback.  The Jazzmaster was a Franken-guitar so no worries, I got the better end of the deal.


Playing it every week for nearly 20 years will mar even the finest fret jobs and frankly it was becoming unplayable.  It’s funny,  I fix my other guitars, I fix my friends guitars.  But I have never touched the PRS.   To start with the neck has always been straight as an arrow and beyond that I think I was afraid to screw it up.  It just has a magical feel.  But the magic was gone so out came the tools.


I checked the fret board for level and sure enough it wasn’t.  I popped off the truss rod cover and found the nut was still loose.  Some folks like Gibson ship them loose from the factory. I guess PRS does too.  A quarter turn or so and the neck was straight again.  On to the frets.


I pulled the strings, masked the fret board to have a look and it was pretty bad.  The wear was pretty severe.  On another guitar I think I would have just started a re-fret.  But these tallish frets I thought I’d try a basic fret dressing and see if I could make it playable again.   I’ve shown a close up of the “before” condition.  Sadly the pictures on the “after” didn’t turn out too well so you’ll just have to trust me.  It’s back playing again and I’m pretty happy with it.  There is still a note some where up around the 18th fret that stretches to mute but I can’t find it unless I’m away from the shop (typical eh?). 

.


The Ramsa DA7:

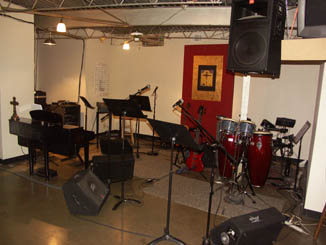
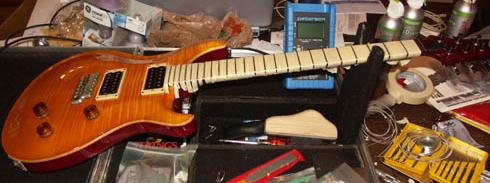
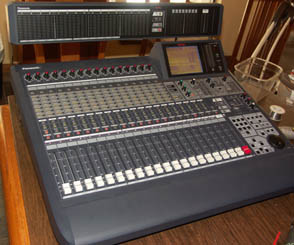
Funhouse used to be a medium sized independent recording studio with about 1700 square feet of very cool recording space.  We got caught in the transition from pure Indie recording to semi-label sponsored recording and closed the business.  I “sold” my rented space to another musician who traded me a, then, state of the art digital mixer for me to leave my custom Mogami/Neutrik wiring harness in place.  It was a good trade as I didn’t want to pull it all from the walls and ceiling.  The DA7 has served me well as digital and analog traffic cop in my home studio ever since… well until it died a year ago. 


It was a slow and painful death.  Some days it would not power up right, motorized faders doing a sad little death dance until the display began to claim some sort of MIDI communications failure.  MIDI?  I disconnect the MIDI… no change. But sometimes it powered right up. I suspected the power.  Sure enough my ETA power strip is faulty but that did not change the behavior of the DA7.  To add insult to injury it was about this time that I finally found the two ADAT I/O cards I’d wanted for my system. 

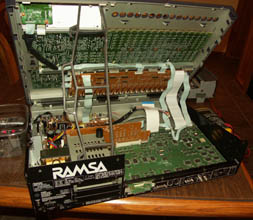
Then one day it refused to power up at all.   I was about to chuck the thing when I reconsidered. “There are a ton of good tinkerin’ parts in there” I thought. So I tore it down on the dining room table.  When I got it open and had all the analog I/O sub-assemblies removed I found something interesting. 


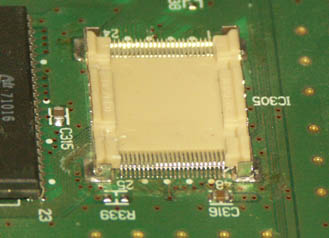
There in the midst of an ocean of surface mount devices was a SOCKET!!!  This is suspicious because a socket like this is usually attached in a different process than the rest of the board.  When this happens you might get poor solder connections with flaky results as the system heats and cools (think XBOX 360 RROD).  I got out all my magnifying devices and took a look.  Sure enough the corners of the socket looked hand soldered and were no longer connected to the main board.  If I pushed down on the socket I could see the signal pins move.  This was the ROM (boot code) for the system.  No wonder it was flaky.  I reflowed the corners and the signal pins and VOILA… well almost. 


To protect the ROM I opened the socket and removed it while doing the repair. Sadly, I damaged the socket. These are not designed for high cycle counts and I had ruined the lid.  

If I held the lid down the system booted up fine.  So not to worry.  There is a nice solid metal shelf where those analog I/O assemblies I mentioned install. So I cut a carriage bolt down to size, wrapped it in electrical tap (for padding mostly) and wedged it into place. 


The DA7 is happy again and about to retake it’s rightful place  as the central hub in my home studio (with those ADAT cards and a new SMPTE card installed!).


All content on this Website belongs to Jim MacDonald Copyright 2009